快速开始
借助 Blog Comment,在你的网站中快速引入评论功能,首先我们先准备一些前置条件:
🛠 前置准备
一、注册 Vercel
vercel 是一个前端友好的网站托管平台,Blog Comment 就是基于 vercel 的 Next.js 开发的。所以 Blog Comment 会部署在 vercel,请确保你注册了 vercel,并可以进入 vercel dashboard
做好以上的前置准备后,我们分以下几步部署和引入 Blog Comment
🔧 部署 Blog Comment
一、获取 mongoDB 数据库的连接 URL
在 mongoDB 官网申请一个数据库集群,然后获取连接 URL 备用。数据库将用来存储评论和用户的数据。
mongoDB connect url 示例:
mongodb+srv://[user name]:[password]@cluster0.2spu1.mongodb.net/myFirstDatabase?retryWrites=true&w=majority
如果你不知道怎么申请数据库,请前往这里 FAQ-怎么申请 mongoDB 数据库
二、Fork 此项目 github 仓库
将 Blog Comment 仓库 fork 到你自己的 github 账号下
三、在 vercel dashboard 上部署 Blog Comment
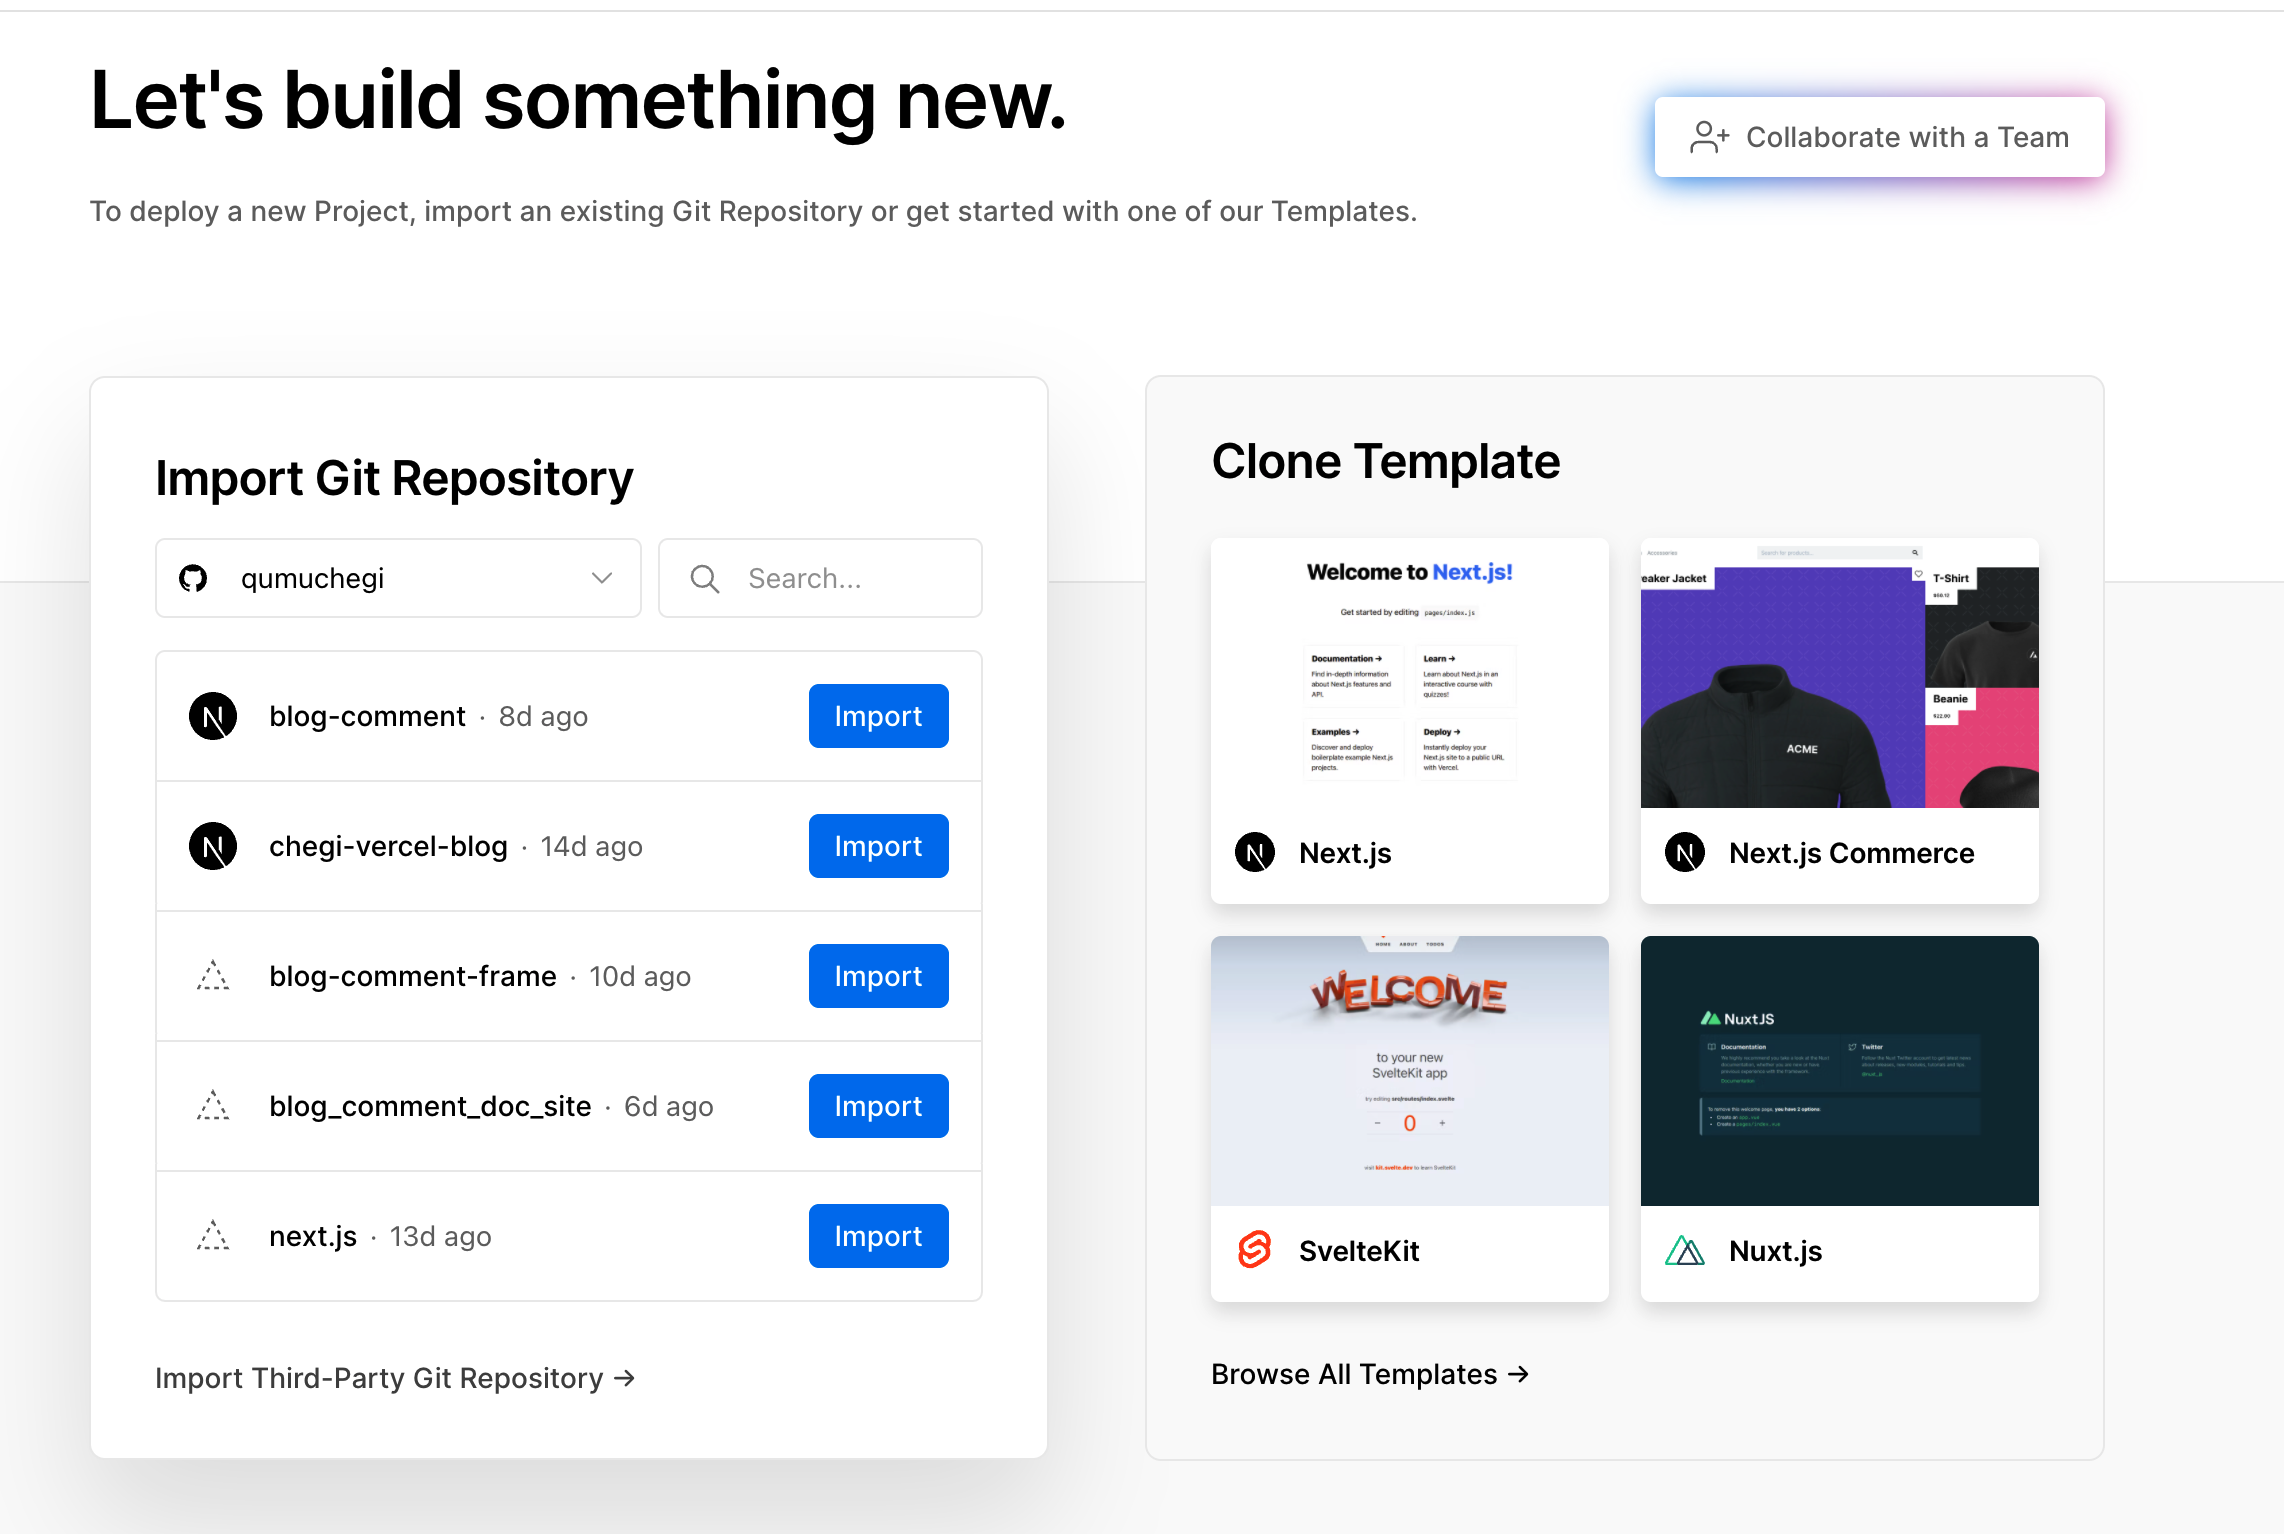
进入 vercel dashboard,点击 + New Project 按钮,然后会跳到下面的页面,在 Import Git Repository 面板选择你在上一步 Fork 的 Blog Comment 仓库,然后点击 import 按钮

四、设置环境变量
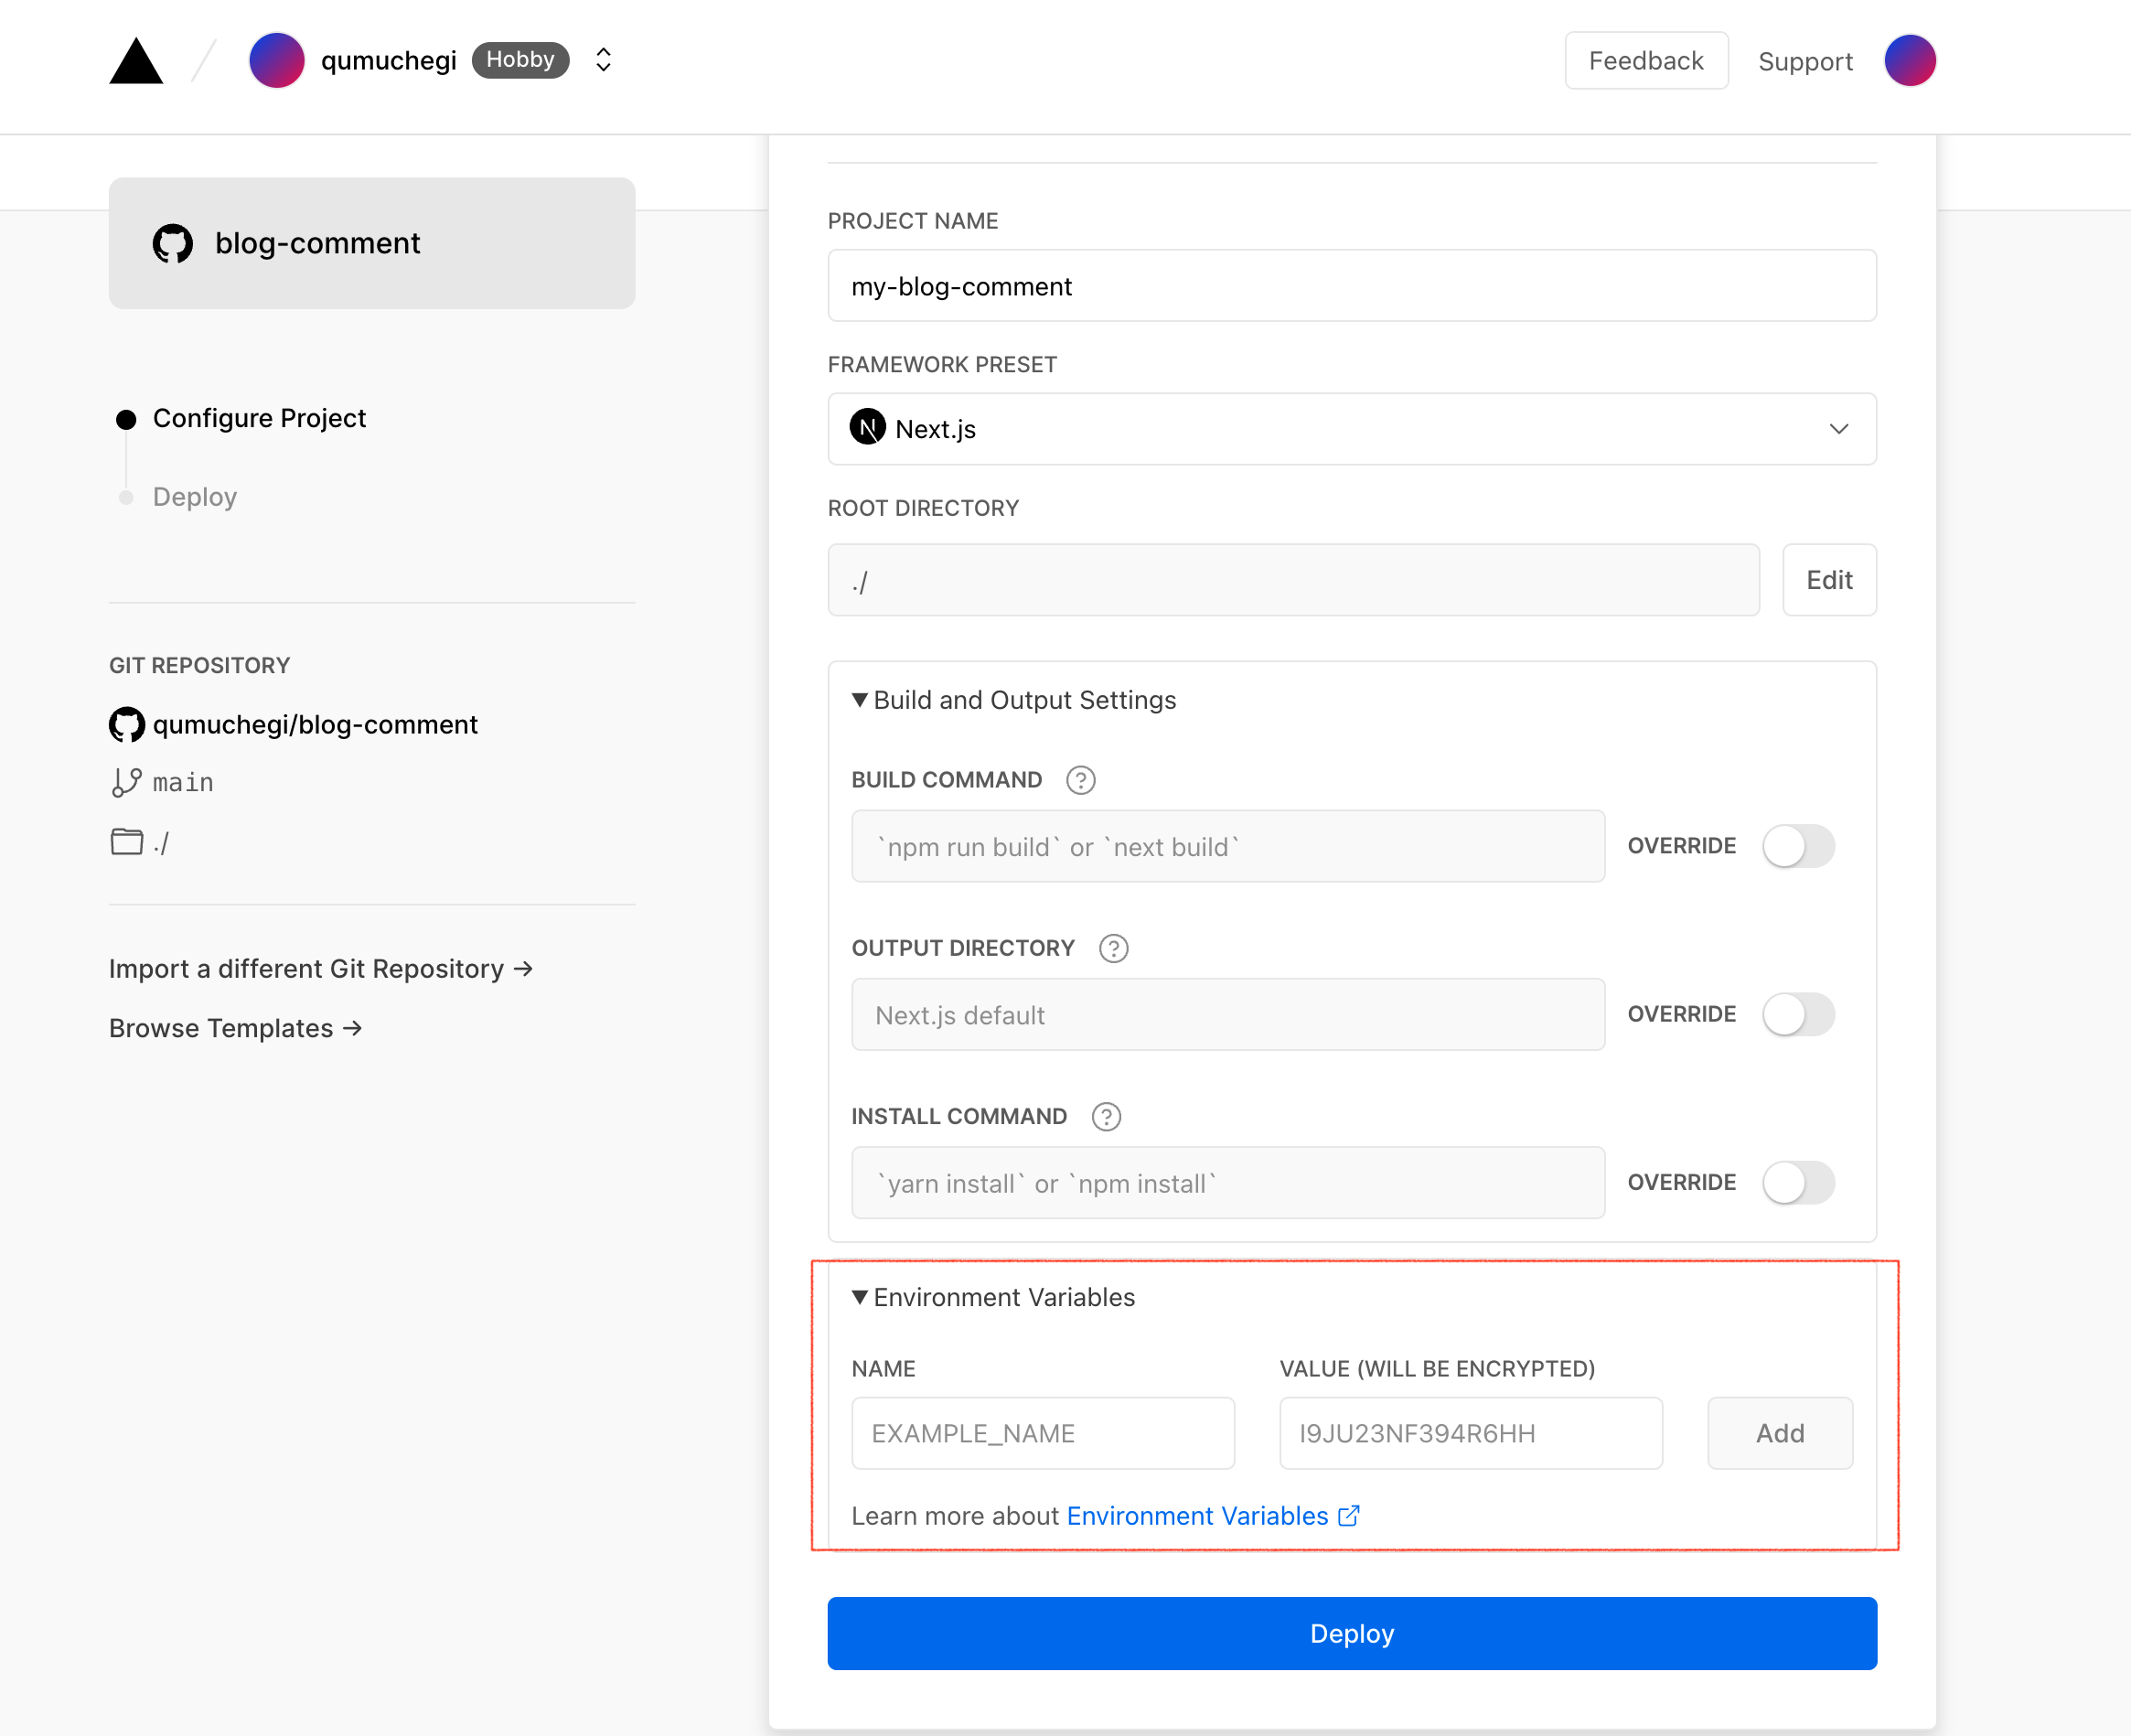
环境变量可以从你的代码中隐藏一些私密的数据,比如数据库密码。vercel 可以在部署你的网站的时候注入这些环境变量的值。在上一步成功 import 了 Blog Comment 后,会进入下面这样的面板,:

在这个 Environment Variables 这一栏,添加一个环境变量叫 mongodbUrl, 值为我们最初准备好的 mongoDB connect url。
点击 Deploy 按钮,等待部署完成后。
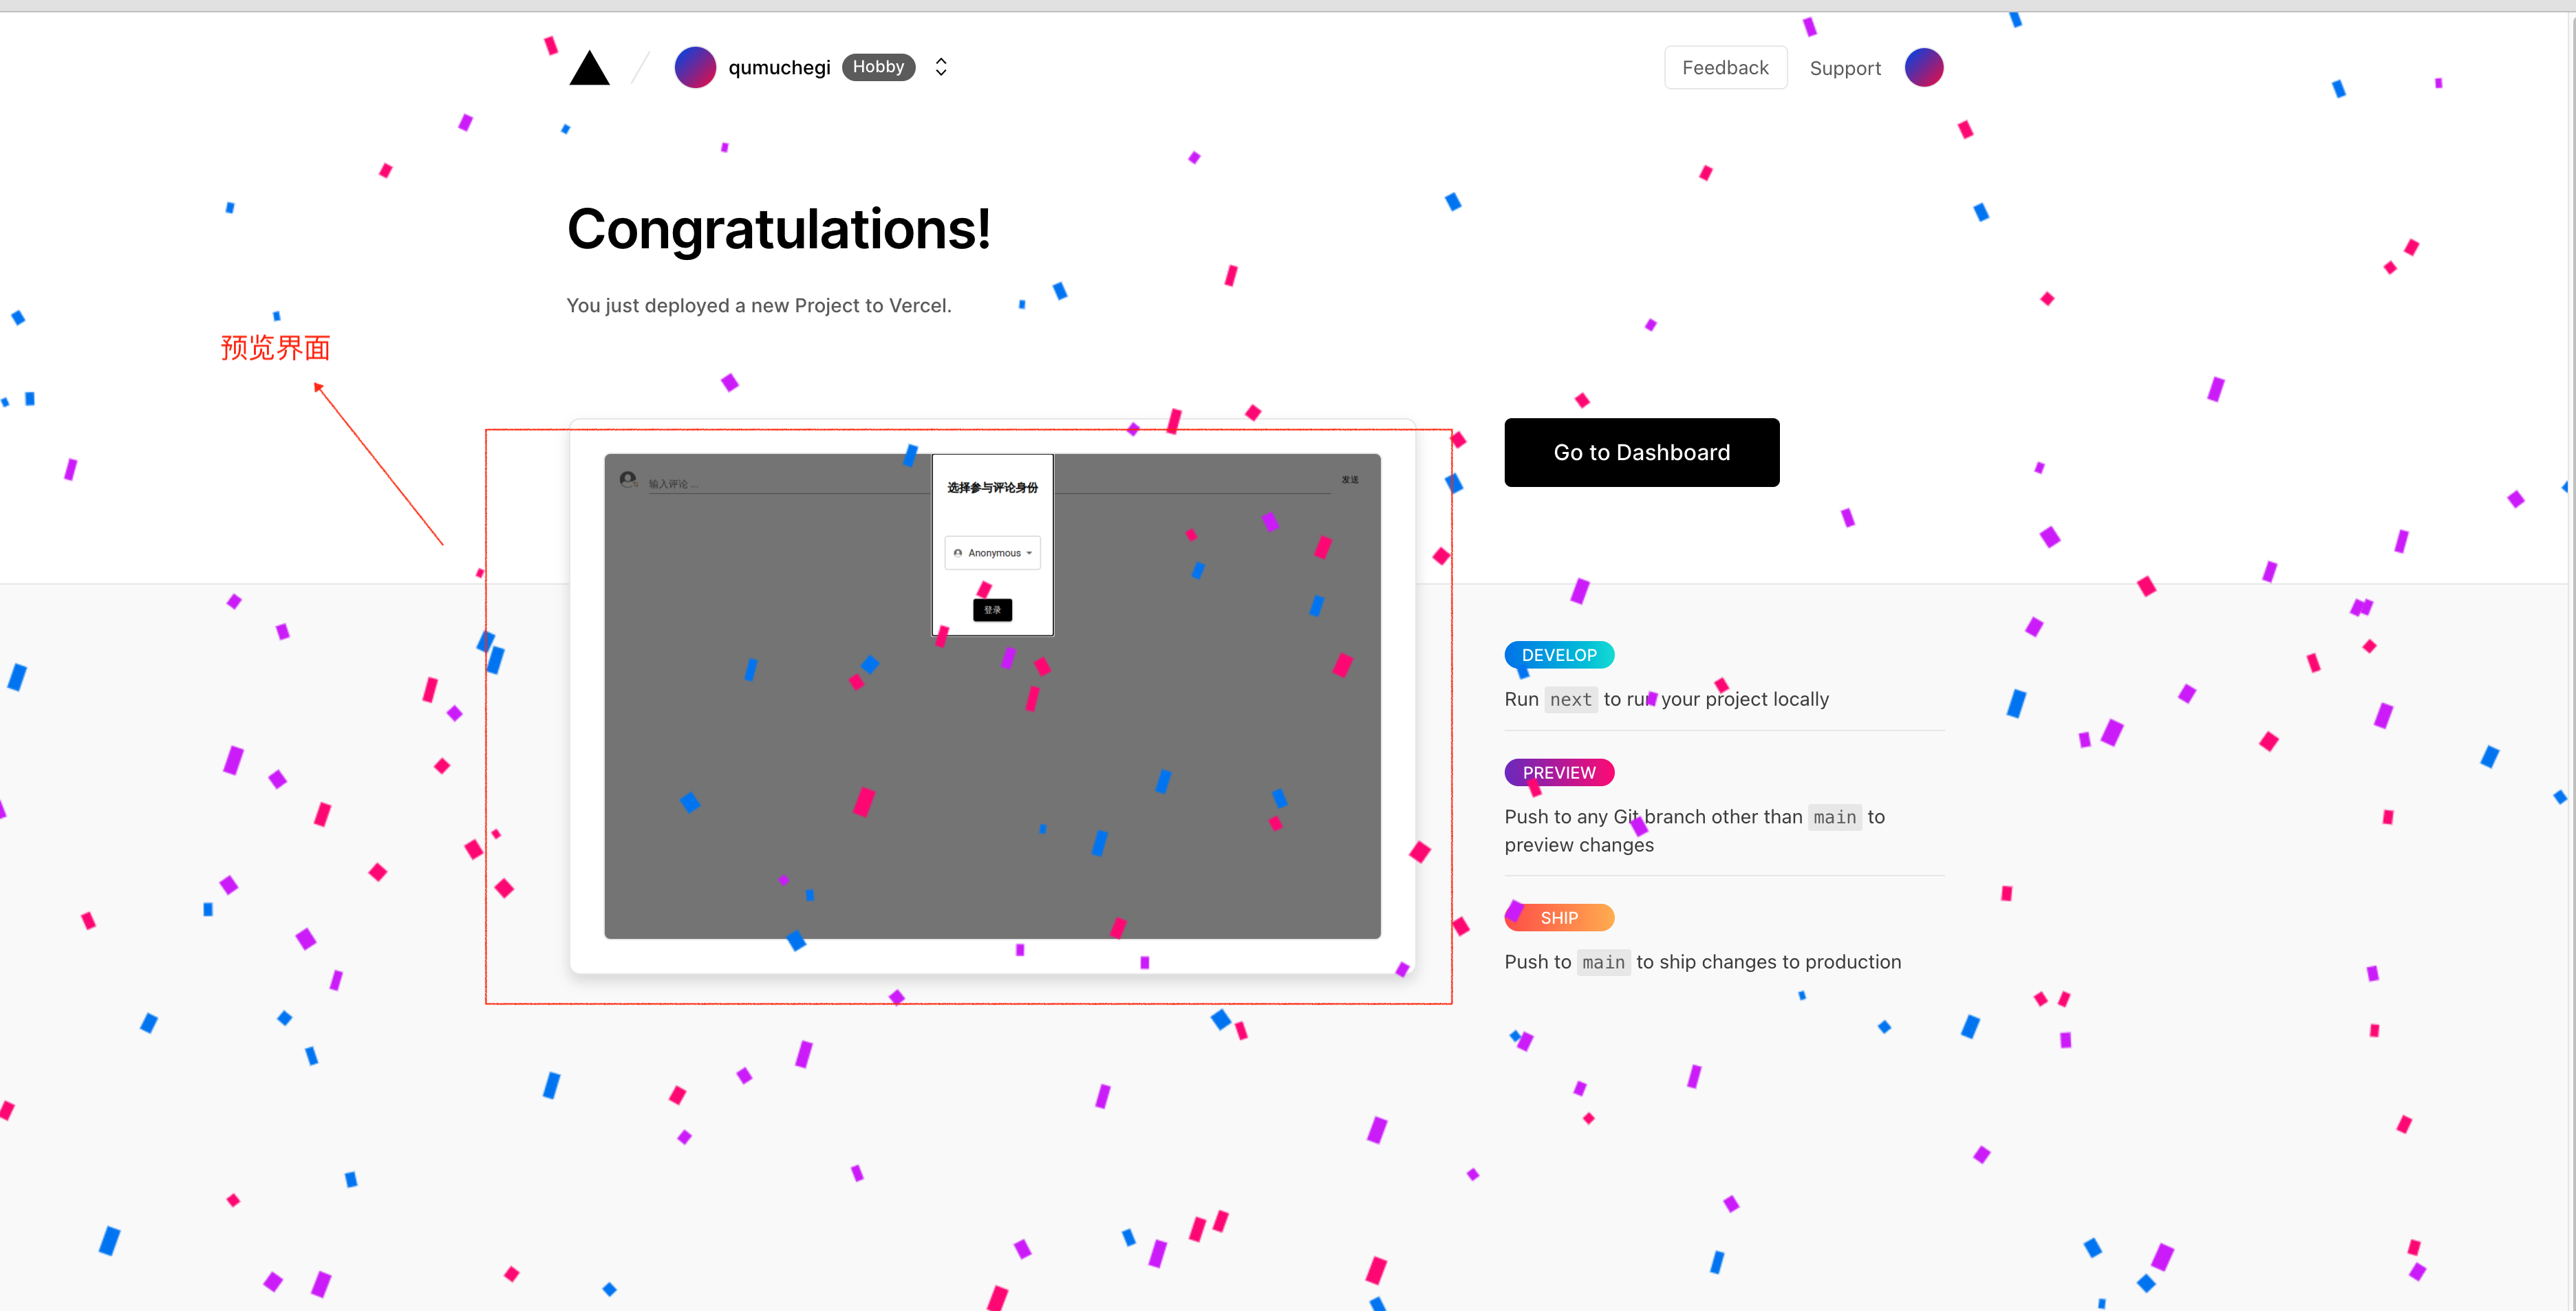
部署成功后的页面:

点击上图中的预览界面区域,会打开 Blog Comment 的部署后的线上页面:

我们复制这个线上页面的 URL 以备用,比如上面这个页面 https://my-blog-comment-phi.vercel.app/。
如果我们的评论组件需要 github 登录,还需要添加两个环境变量, GitHub OAuth application 的 Client ID 和 Client Secret,支持评论者登录 Github 账号
⚙️ 引入 Blog Comment
我们已经部署好了 Blog Comment,这一步把它引入我们的个人网站。我们有以下几种方式引入:
对于 React 项目
一、安装 blog_comment_frame
在你的个人网站项目根目录下,执行命令:npm i blog_comment_frame
// or
yarn add blog_comment_frame
二、在需要引入评论组件的页面添加以下代码:
import BlogCommentFrame from 'blog_comment_frame'

function Article() {

  return <div>
    <div>article content</div>
    <div>
      <h2>评论</h2>
      <BlogCommentFrame
        commentDeployHost={'http://xxxx.vercel.app'}
        pageId={'xxxxx'}
      />
    </div>
  </div>
}
这里 commentDeployUrlHost 传我们在之前部署好的 Blog Comment 的线上地址 https://my-blog-comment-phi.vercel.app/
pageId 是用于存储评论数据的索引,所以确保这个页面不同内容对应的 pageId 是不一样的。
前端框架无关的引入方式
一、安装 blog_comment_frame
在你的个人网站项目根目录下,执行命令:npm i blog_comment_frame
// or
yarn add blog_comment_frame
二、在需要引入评论组件的页面添加以下代码:
import { BlogCommentShell } from 'blog_comment_frame'

BlogCommentShell({
  containerId: 'blog-comment-parent-container',
  commentDeployHost: 'http://xxxx.vercel.app',
  pageId: 'xxxx',
  auth: ['github', 'anonymous']
})
最后看看我们的评论组件的效果:
